📋 What This Guide Covers
How to cover a wall section with square mirror tiles using the seamless method: tiles glued directly to the wall with open hairline joints — no grout, no frames — so the joints read as fine lines and the wall reads as one continuous mirror. Adhesive, careful lines, and patience. Use it for accent walls, closet doors, entryways, and small rooms that need light and the illusion of space.
- Plan the layout and buy the right number of tiles the first time
- Check the wall can actually hold mirror mastic, prep it, and snap the center reference lines
- Gun on vertical beads of mirror mastic and set tiles from the center outward
- Score and snap edge tiles cleanly by hand
- Trim exposed edges, polish up, and leave every gap open to breathe
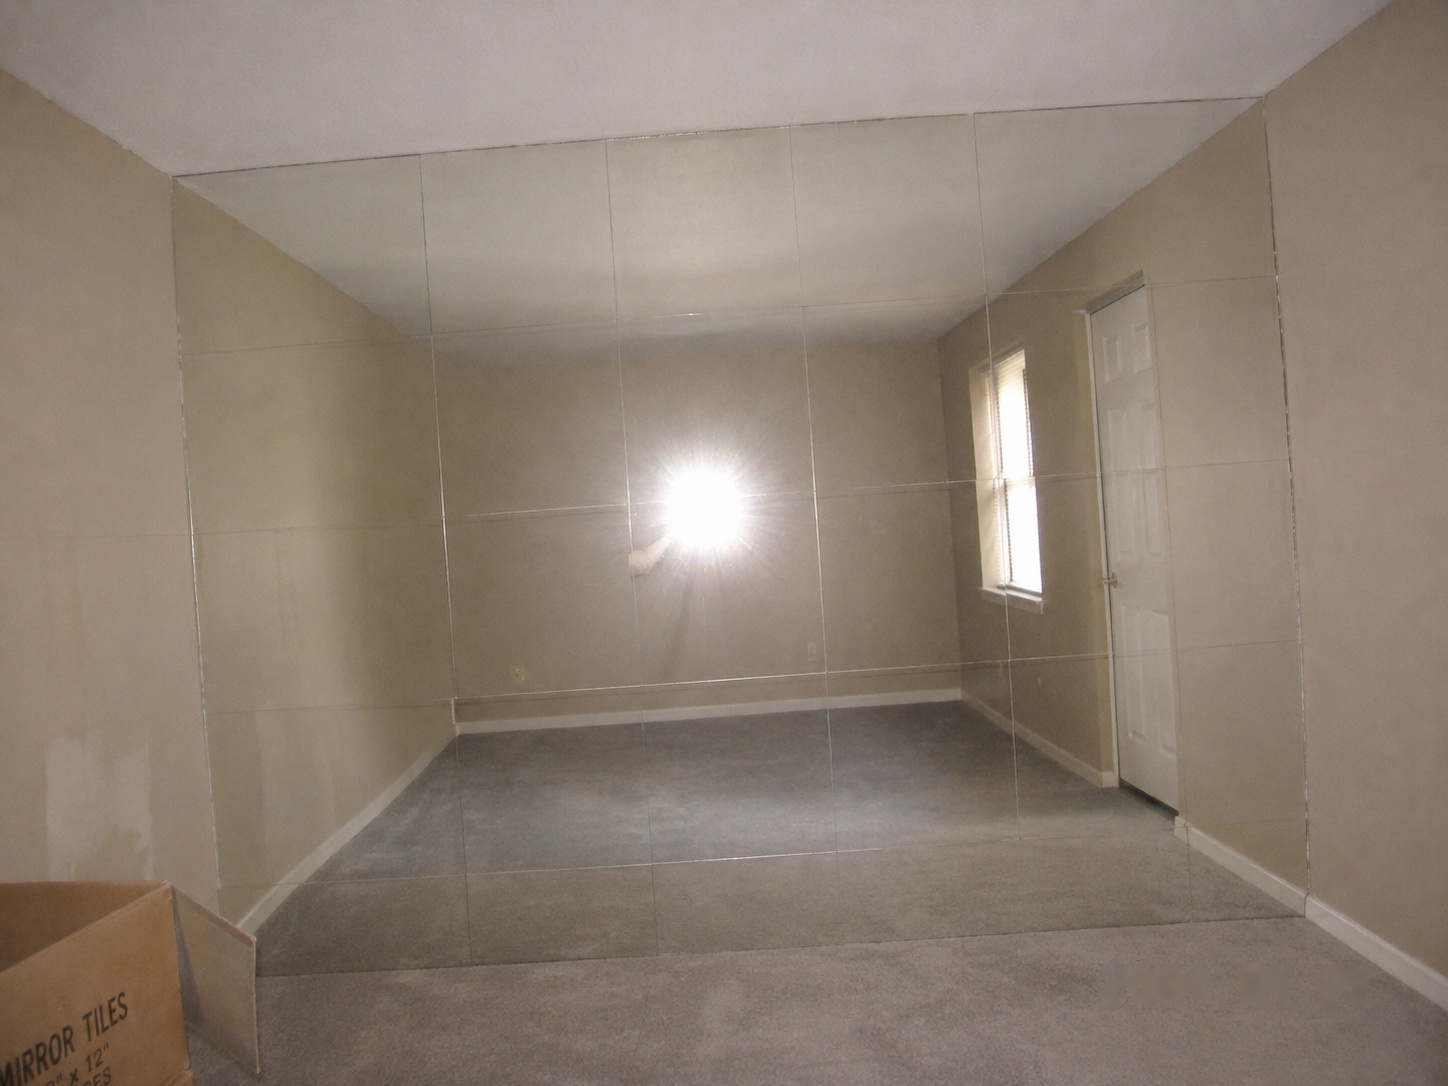
The goal: a finished seamless mirror-tile wall — hairline joints, one continuous reflection.
⚠️ SAFETY WARNINGS
- Wear ANSI Z87.1 safety glasses whenever cutting or handling tile — glass fragments are dangerous
- Wear cut-resistant gloves — tile edges, especially fresh-cut ones, are razor sharp
- Ventilate the room while mastic is open and curing — the house MS Polymer is solvent-free and low-emission, but fresh air is still the rule
- Dropped mirror tiles shatter — carry one at a time, keep the floor clear
- Broken fragments underfoot are a slipping hazard — sweep as you go
- Knee pads for floor-to-ceiling jobs; wipe adhesive spills immediately — it is slippery
🔧 Tools Needed
- Tape measure (25-foot metal tape)
- Level (24" minimum — 48" preferred for large areas)
- Pencil, plus a chalk line for long reference runs
- Caulking gun (drives the mastic cartridges)
- Putty knife (for spackling during wall prep)
- Glass cutter with cutting oil (carbide wheel)
- Straightedge or T-square (to guide the score)
- 1/16" tile spacers or a few playing cards (joint feeler gauge)
- Running pliers (optional — cleaner snaps on narrow cuts)
- Sanding block with 120-grit (wall prep) and 220-grit (smoothing cut edges)
- Utility knife (opens cartridges)
- Safety glasses (ANSI Z87.1) and cut-resistant work gloves
📦 Materials
- Mirror tiles — 12×12" is standard; buy 10–15% extra, all from the same lot
- Bohle Xtragrip MS Polymer mirror mastic cartridges — the house standard; very strong initial tack, backing-safe per DIN EN 1036; estimate cartridge count from the coverage figure on the label
- Xtraprime primer — only if the wall is porous: bare plaster, concrete, brick, or wood
- Spackling compound (wall repairs)
- Isopropyl alcohol + clean lint-free rags (final wall wipe-down)
- Edge trim — aluminum J-molding or plastic edge strip, enough for all exposed edges
- Painter's tape, drop cloth
- Mineral spirits (adhesive cleanup)
- Ammonia-free glass cleaner + microfiber cloths (final polish)
📋 Installation — 5 steps
Fifteen minutes with a tape measure and a notepad saves a second trip to the store — and decides how good the finished wall looks.
Measure and do the math:
- Measure the wall area: width × height, in inches
- Square feet = (width × height) ÷ 144 — each 12×12" tile covers exactly 1 sq ft
- Add 10–15% extra for cuts, breakage, and future repairs
Example: 48" × 72" wall = 24 sq ft → 24 tiles + 3 spare = 27 tiles
Decide the look:
- Straight grid is the standard; a diagonal (diamond) layout looks dramatic but adds 45° cuts on every edge tile
- Tile finishes: standard silver, antiqued, smoked, or tinted
- Buy every box from the same manufacturing lot — batches vary slightly in tint, and a mirror wall shows it
Plan where the cut tiles land:
- Sketch the wall on graph paper, one square per tile
- Center the layout so cut tiles fall at the edges — never in the middle of the field
- If the layout leaves a sliver (under ~2") at an edge, shift the whole grid half a tile to fatten it up
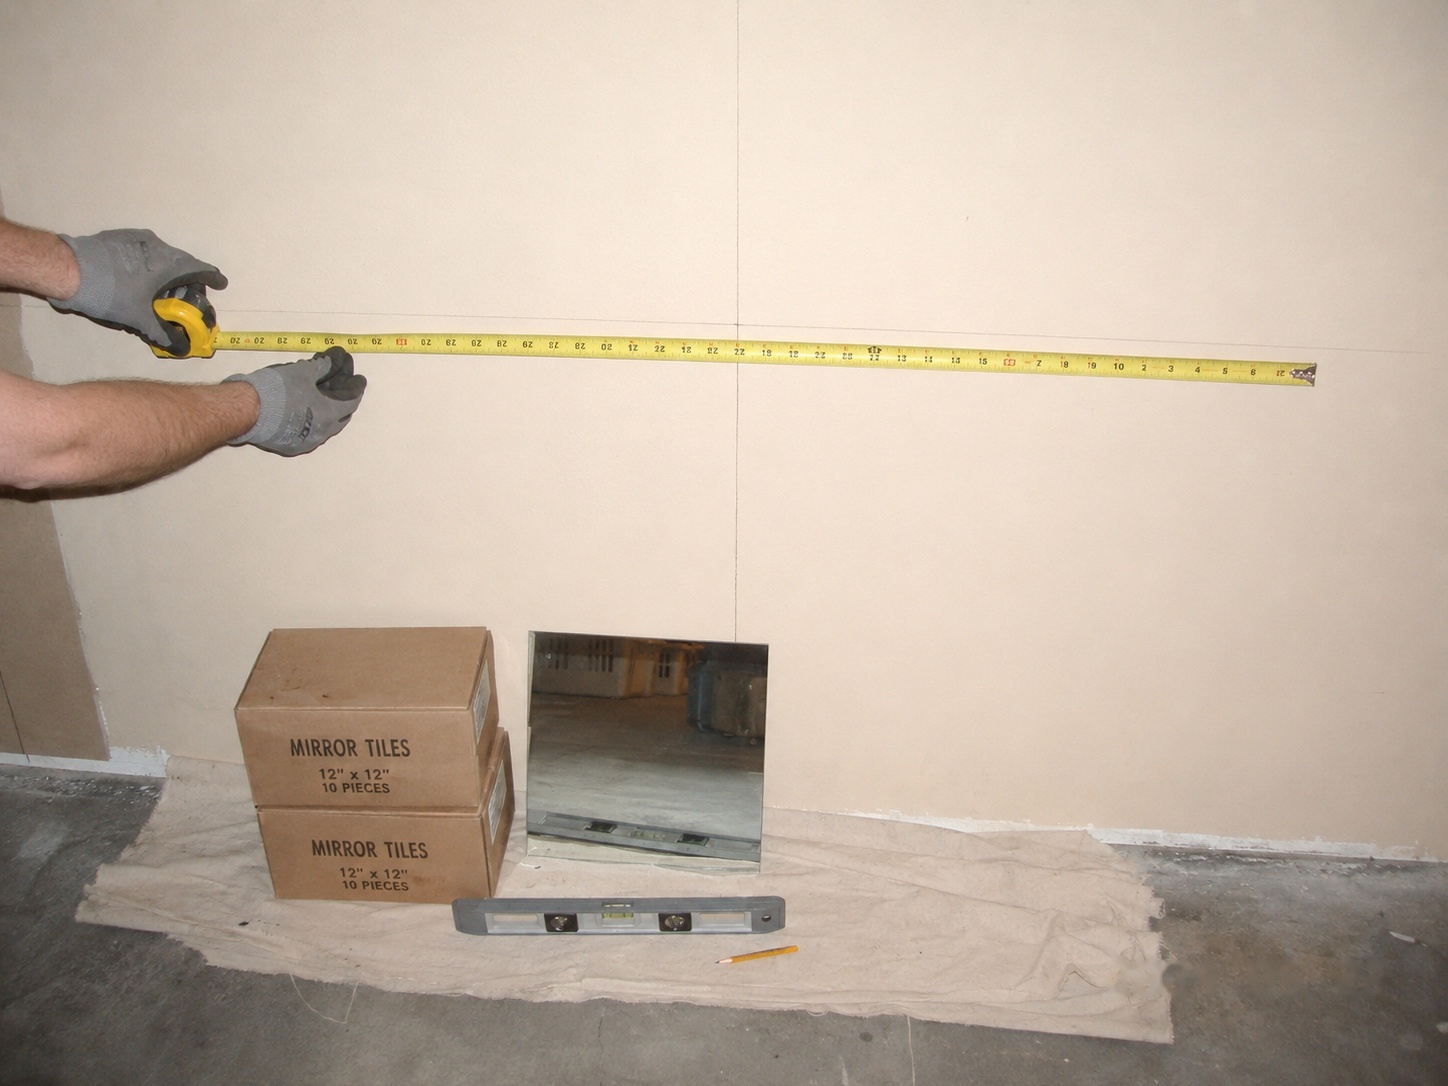
Measure the wall, mark the center point, and sanity-check the tile count before opening a single box.
The tiles will follow whatever surface and lines you give them. Give them a sound, clean wall and a true center cross.
Know your surface — will the mastic hold?
The mastic only holds what the wall's surface layer holds. It will grip paint perfectly — and if that paint is flaking off the wall, the tiles leave with it. Per Bohle's guidance for their Xtragrip mirror adhesives:
| Wall surface | Bonds? | Prep required |
|---|---|---|
| Painted drywall or plaster (sound, well-stuck paint) | ✓ Yes | Scuff any gloss, clean, dry |
| Bare plaster, concrete, brick — mineral surfaces | ✓ With special primer | Xtraprime first — porous walls drink the adhesive |
| Wood and wood-based boards | ✓ With special primer | Xtraprime first, same reason |
| Ceramic tile, glass, metal | ✓ Yes | Degrease thoroughly — slick surfaces bond well but hold grease better |
| Wallpaper, flaking paint, chalky or dusty walls | ✗ No | Strip back to a sound layer — never bond over a loose one |
Make the wall sound, smooth, and clean:
- Fill every hole and crack with spackling compound; sand patches flush with 120-grit
- Porous walls (bare plaster, concrete, wood): brush on Xtraprime — the special adhesion primer made for mirror mastic — undiluted, and give it about an hour to dry. Ordinary paint or drywall primer is not a substitute
- Vacuum the dust, wipe the wall down, then do a final pass with isopropyl alcohol — the wall must end up clean, grease-free, and fully dry
Snap the center cross:
- Mark the center point of the wall area
- Draw a vertical line through it with a level; snap a chalk line for long runs — then wipe the loose chalk off and pencil over the line where you need it. Chalk is dust, and dust is the enemy of the bond
- Draw a horizontal line through the same point, perpendicular — verify with the level, not by eye
- Large walls: add extra grid lines every 2–3 ft to keep far rows honest
Dry-run before any adhesive:
- Test-fit a row of tiles on the floor against your marks, spaced with the same 1/16" gaps you'll use on the wall — across an 8-tile row the gaps add up to nearly half an inch, which moves where your edge cuts land
- Confirm the edge tiles aren't slivers
- Take a photo of the marked wall; you'll cover your lines as you work
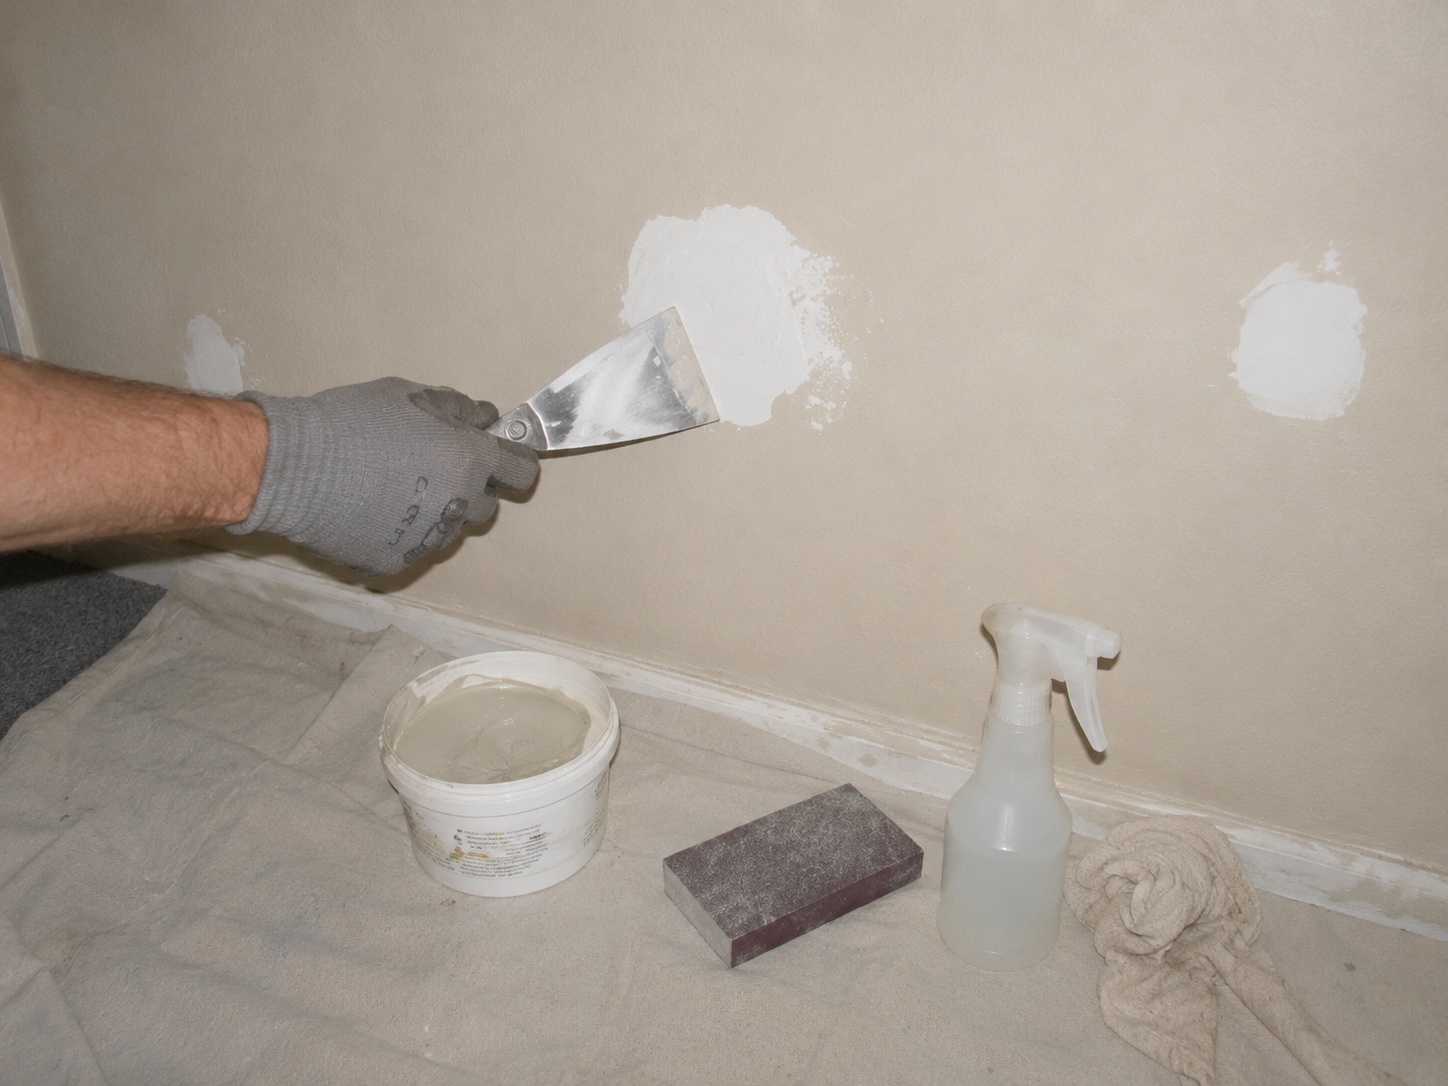
Patch, sand, clean: the unglamorous step every good wall stands on.
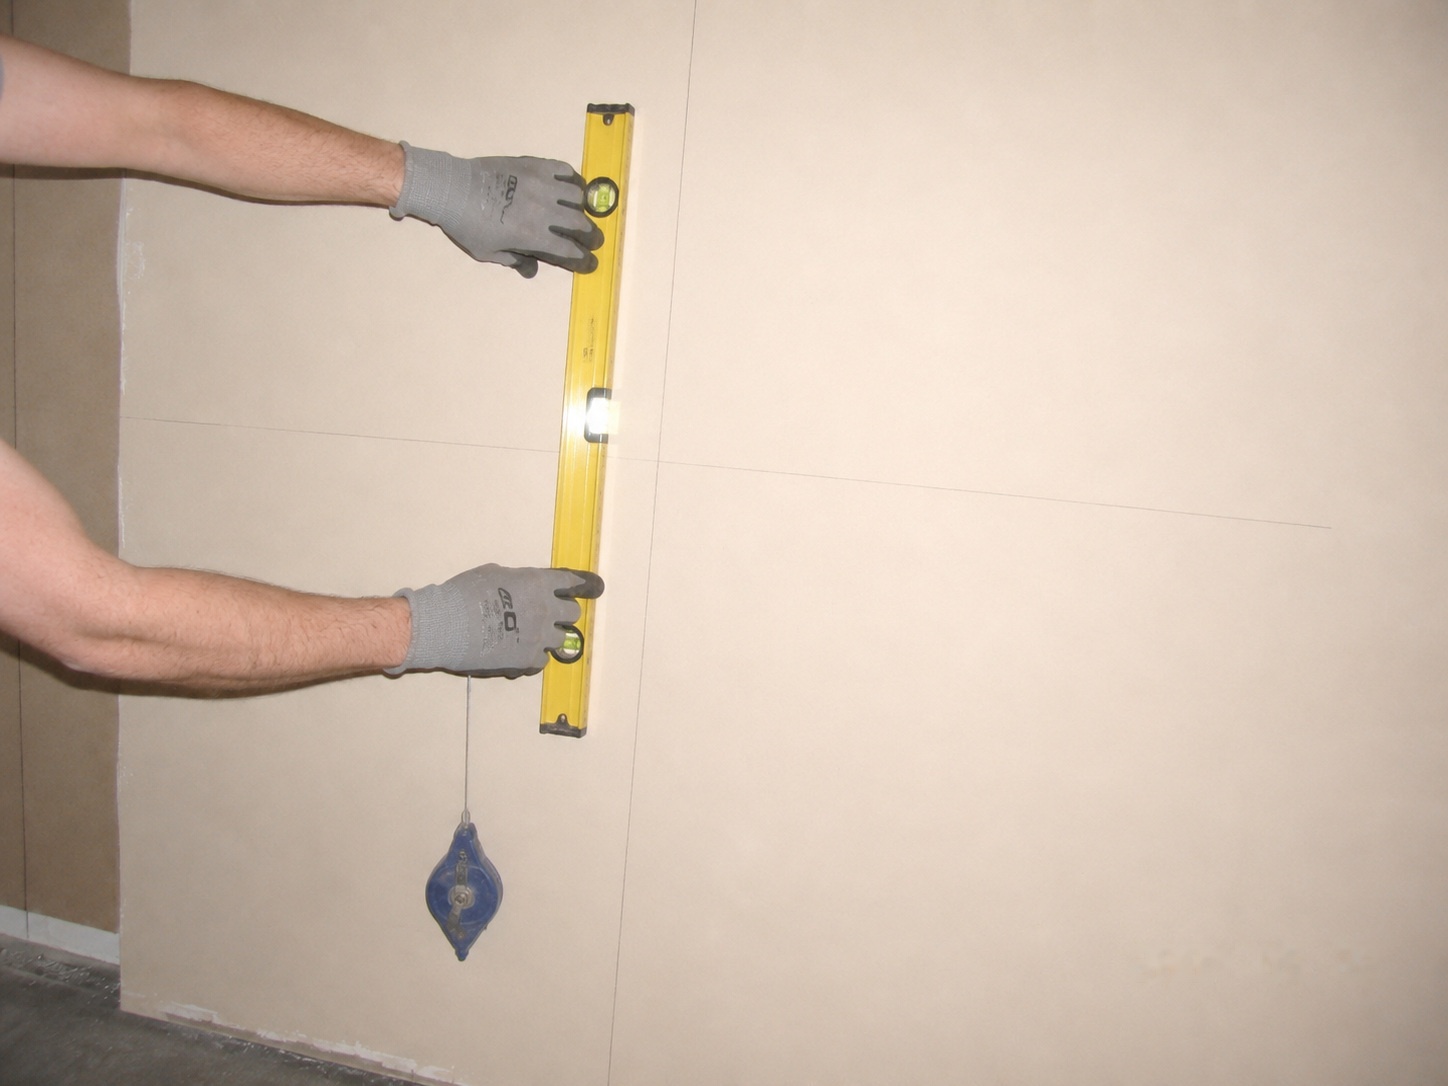
A true vertical and horizontal through the center — checked with the level, never eyeballed.
The heart of the job. Vertical beads, firm presses, consistent hairline gaps — and never slide a tile.
Gun the mastic on:
- Use Bohle Xtragrip MS Polymer in the caulking gun — it's formulated to be safe on the silver backing (DIN EN 1036); ordinary construction adhesive corrodes it into black blotches
- Cut the cartridge nozzle for a bead about 1/4" wide — Bohle caps bead width at 10 mm (about 3/8")
- Lay vertical beads on the wall, inside the space the next tile will cover — a bead every 3–4", three or four per tile, the way the shop photos show
- Keep the outer beads an inch or two in from the side joint lines — a bead at the edge squeezes into the open joint when you press
- Keep each bead to about 8" — roughly 2" short of where the tile's top and bottom edges will land (Bohle caps a bead at 200 mm) — so pressing never squeezes mastic toward the joints
- Beads, never dots or troweled patches — Bohle is explicit: strips flex with the wall and leave air paths; blobs make stress points and trap moisture
- Vertical matters: upright beads leave open channels behind the glass, and tile over tile those channels line up into flues running the height of the field — the wall breathes bottom-to-top, which the mastic needs to cure and the backing needs to stay dry. The 1/16" joints are the intakes; the open top edge is the exhaust
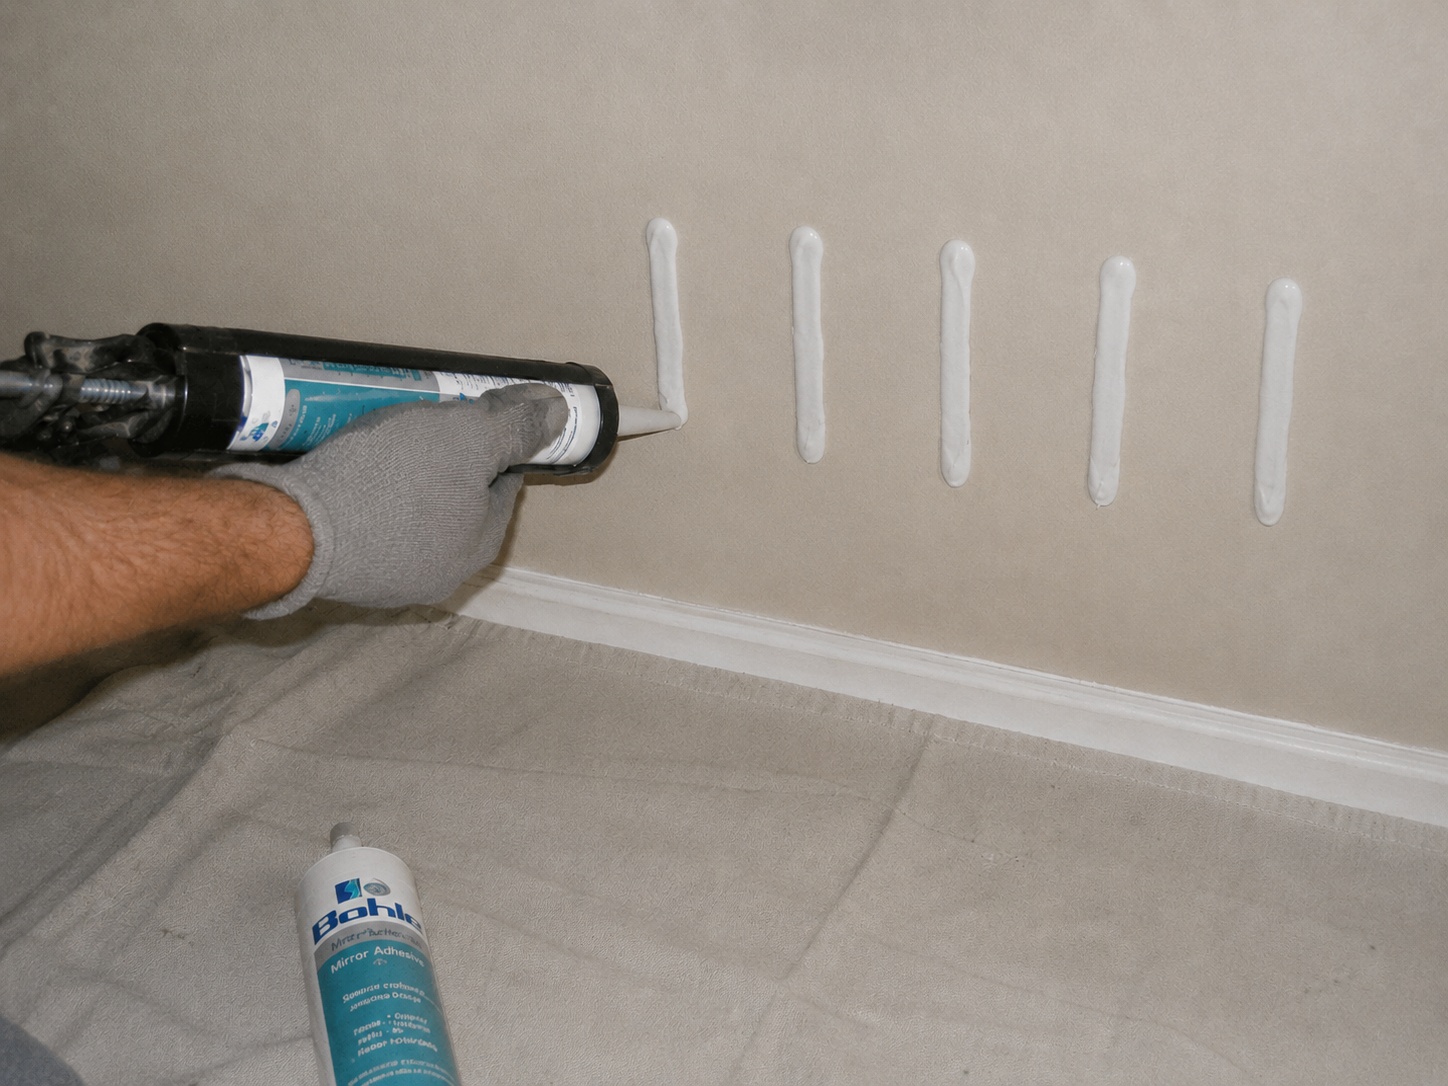
Vertical beads of Bohle mastic gunned onto the wall — one tile's worth at a time, stopped short of the joint lines.
Set the first tile at the cross:
- Line the tile's corner up with the center intersection — the whole wall grows from this tile
- Press it flat with both palms, firm and even, so every bead spreads and grips
Work outward, joint by joint:
- Leave a 1/16" gap around every tile — 1/32" is the absolute minimum. Glass expands, houses settle (especially new construction), and hard glass-to-glass contact grinds and chips the edges as everything moves
- The gaps are also part of the ventilation: open joints feed air into the bead flues. At 1/16" they still read as hairlines — the "seamless" look survives
- Keep the gap consistent with a 1/16" tile spacer or two playing cards as a feeler; slip it against the last tile, set the next, pull it once the bead grabs
- Grow outward from the center in all directions, section by section
- Check the rows with a level or straightedge every 3–4 tiles — drift compounds fast
- Wipe any adhesive squeeze-out off the glass immediately, before it sets
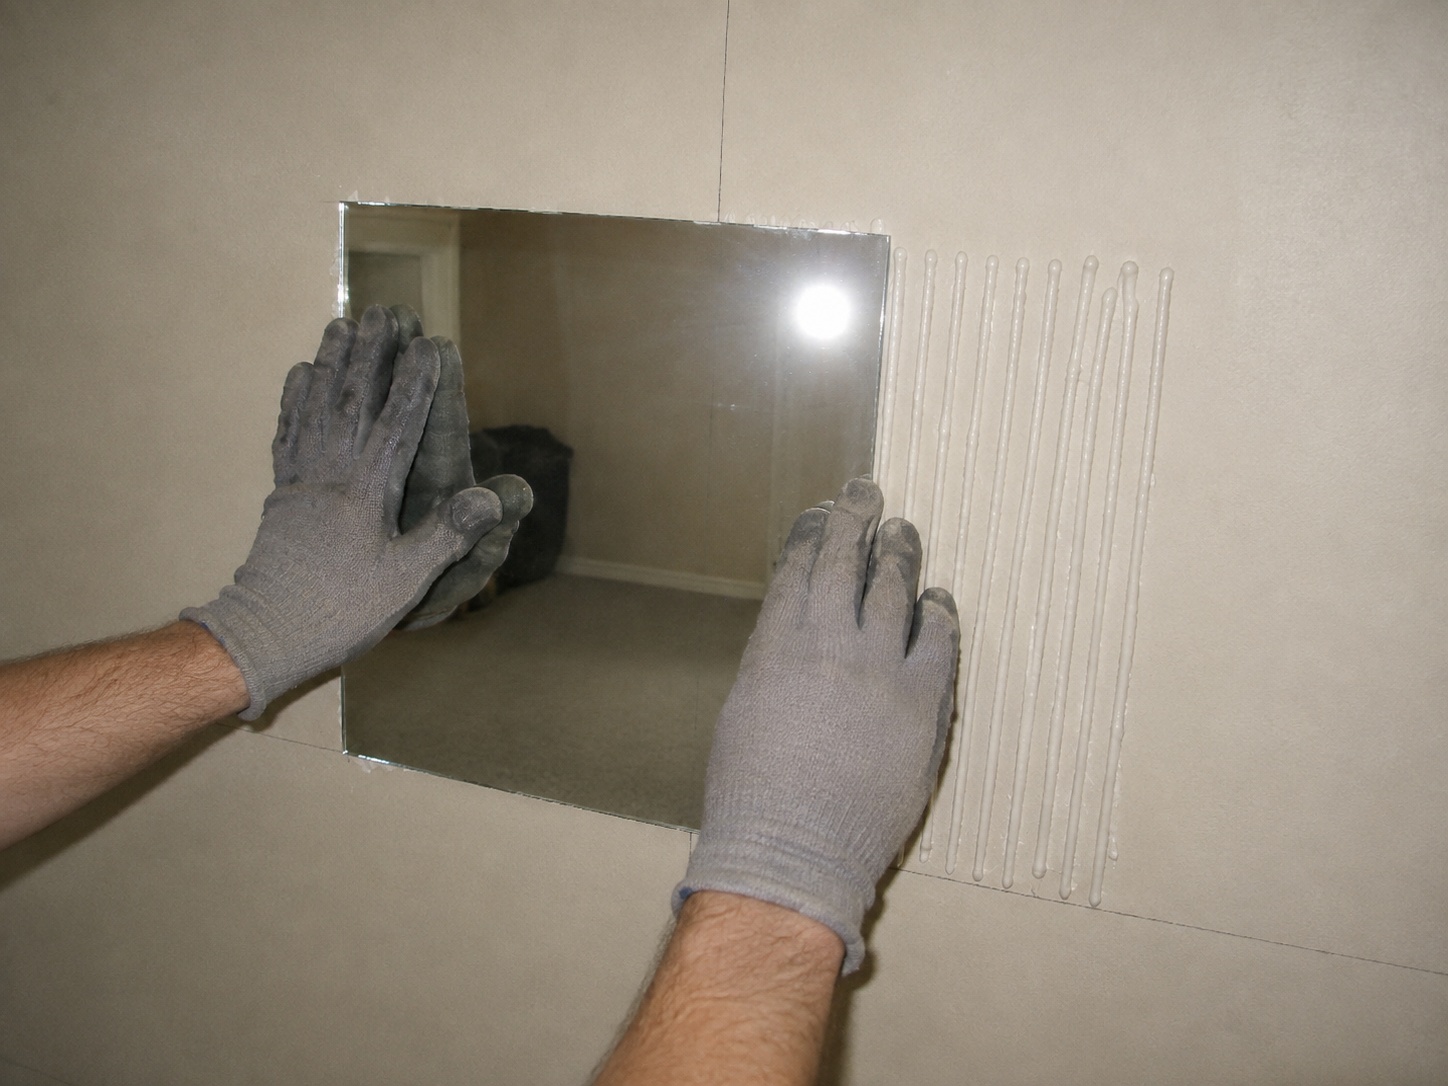
Flat palms, firm press — set exactly on the center cross.
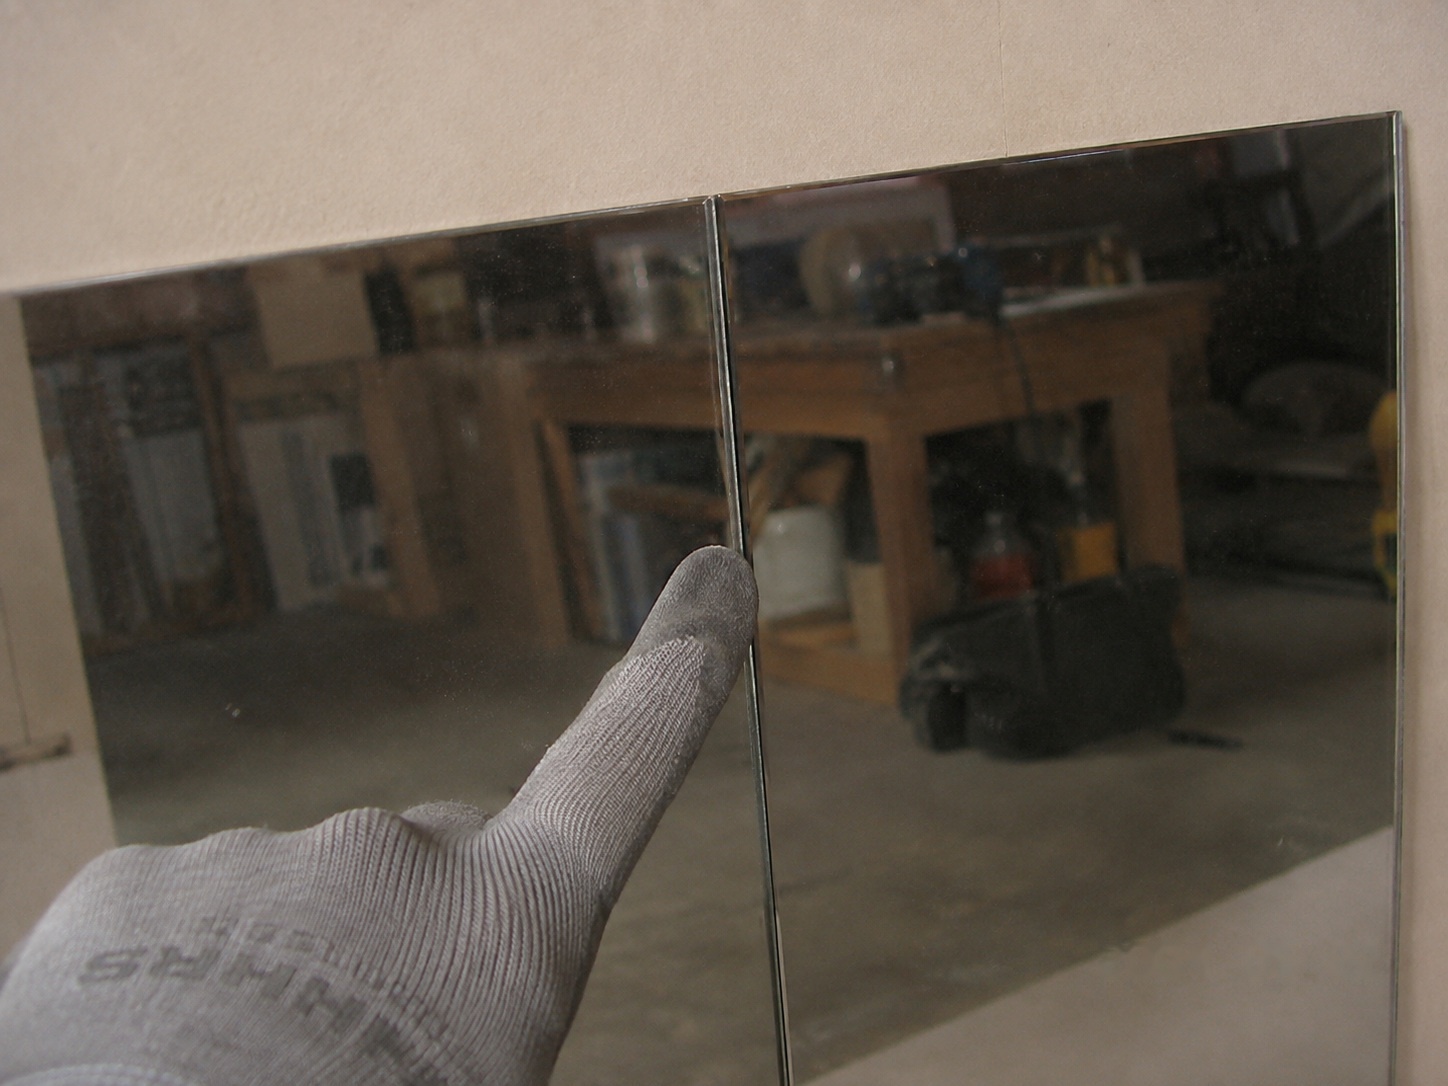
The joint: a consistent 1/16" hairline — expansion room and airway, reading as a fine line.
Score once, snap once. Hand-cutting mirror tile is easier than it looks — if you let the score line do the work.
Measure each gap on its own:
- Walls are never square — measure the gap for every edge tile at both ends, top and bottom
- Subtract the joint gap on both sides of the cut piece: 1/16" at the tile joint, and the same again where glass meets wall, ceiling, or floor — glass should never touch the structure hard. Where the edge is exposed, trim covers it later; everywhere else the gap simply stays open
- Transfer the measurement to the tile and mark the cut line on the mirror face
Score:
- Tile mirror-side up on a padded bench, straightedge clamped along the line
- Oil the cutter wheel, then score in one smooth continuous pass, firm and even
Snap:
- Line the score up with the bench edge over a folded towel, overhang out
- Hold the tile flat with one hand, press the overhang down firmly — it parts along the score
- Narrow strips: use running pliers instead of the bench edge
- Smooth the cut edge with 220-grit used wet, one or two light passes
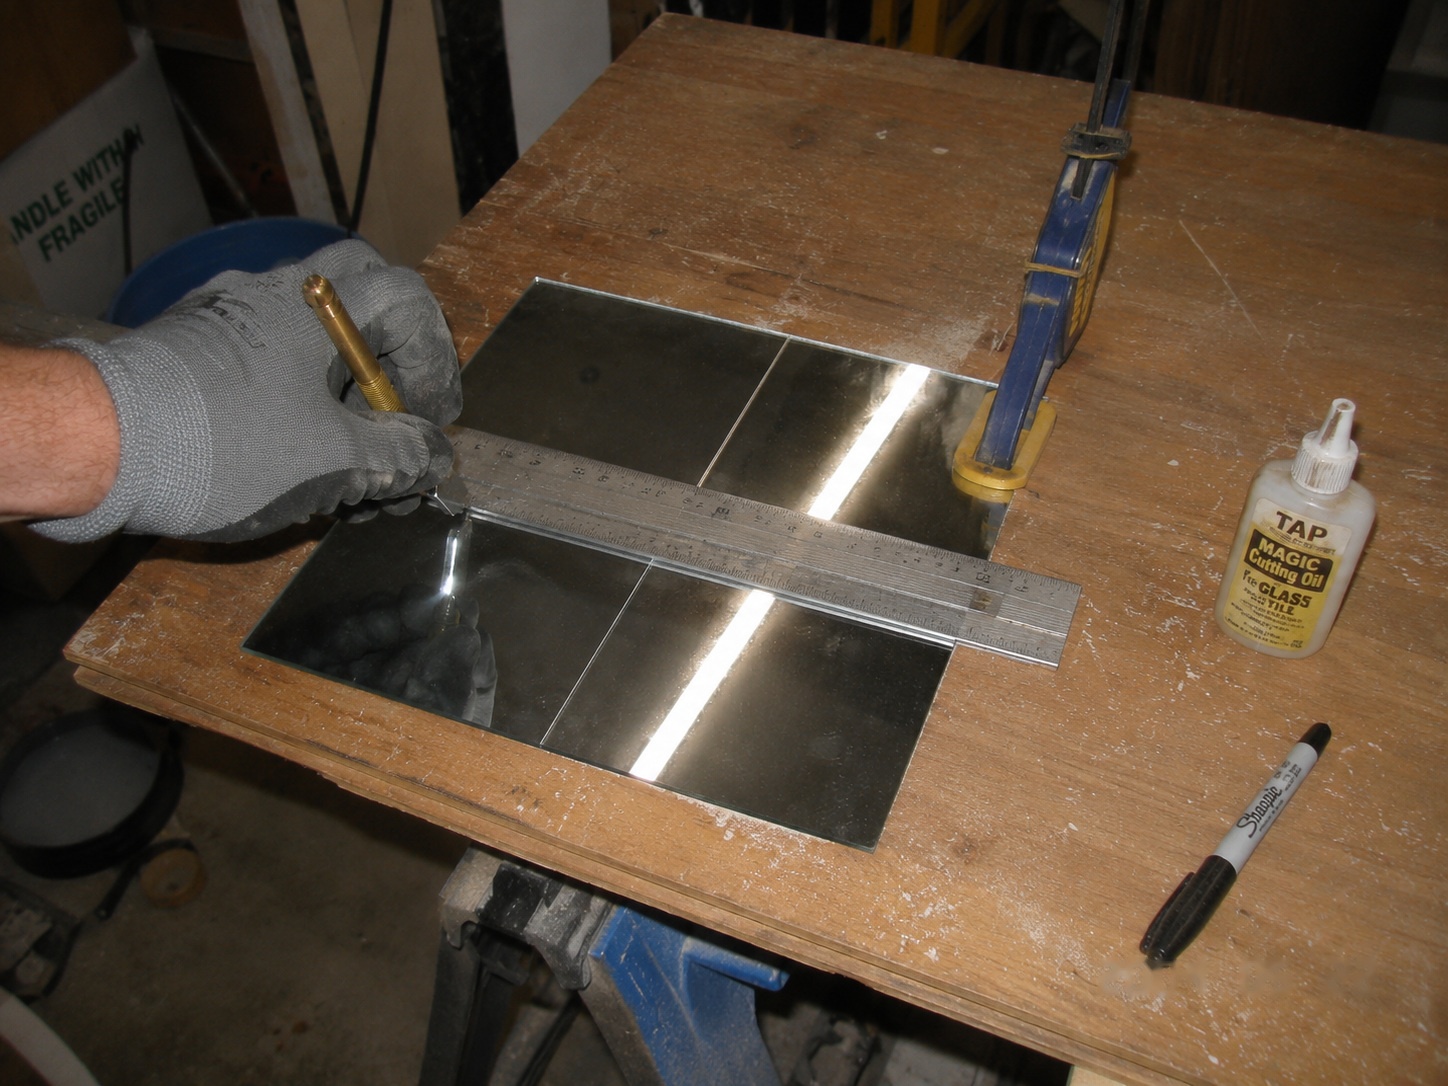
Face up, straightedge guiding, one oiled scoring pass.
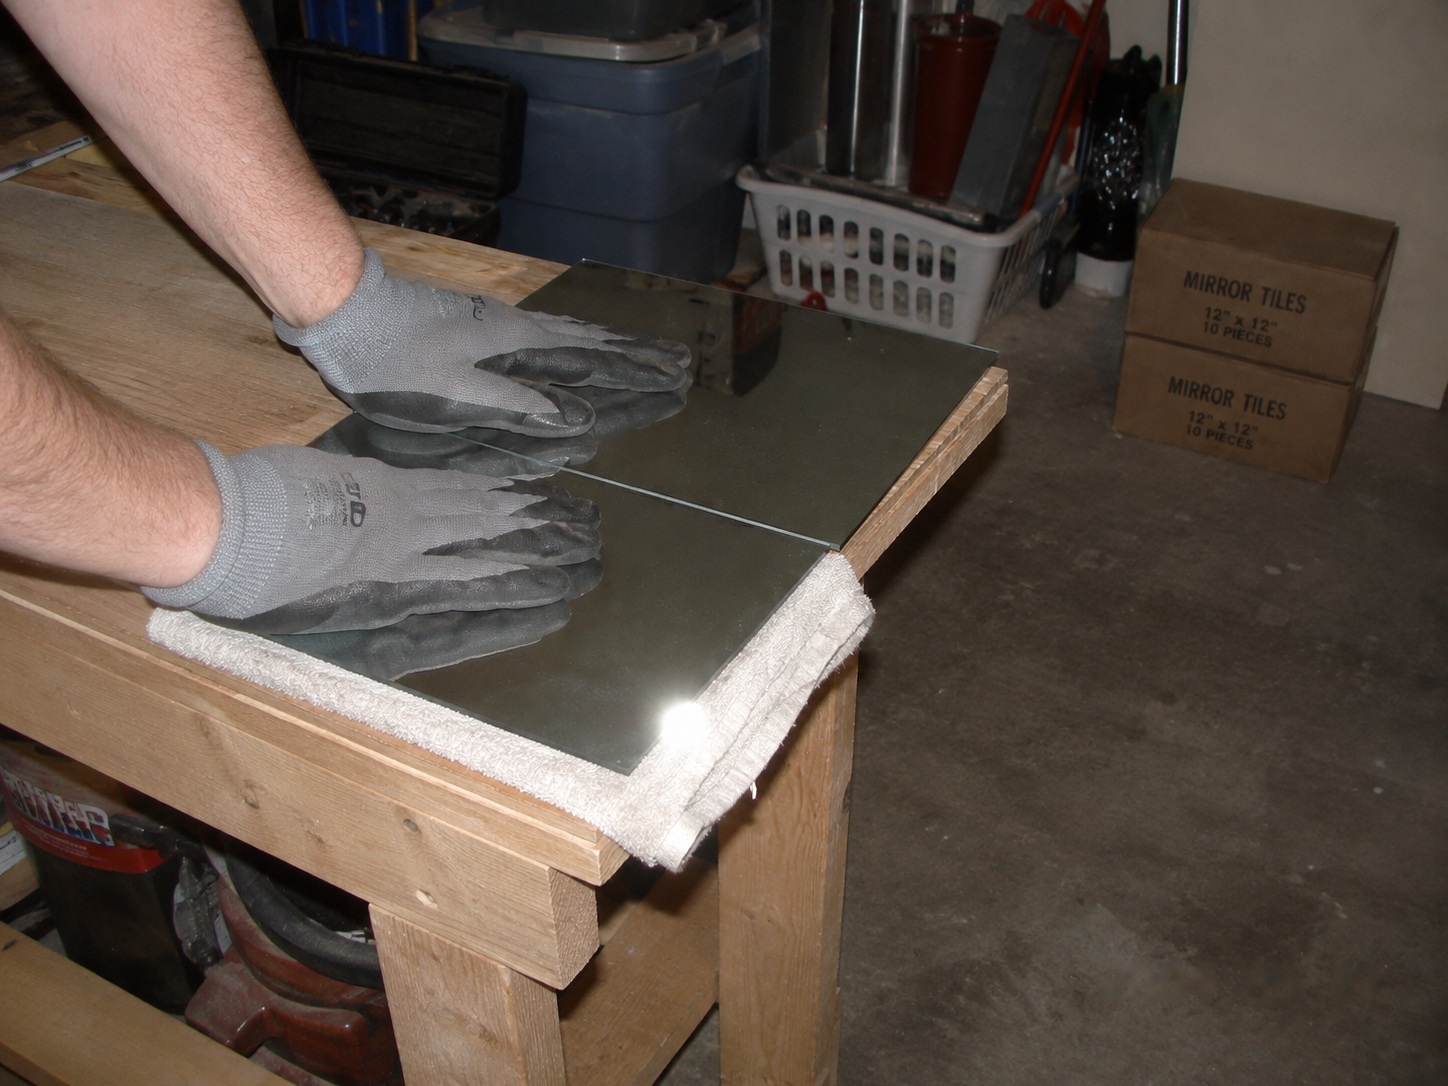
Score line on the padded bench edge — press down and it parts clean.
Trim the exposed edges, polish the glass — and leave every gap open. The airway is the finish.
Trim the exposed edges:
- Cover raw outer tile edges with aluminum J-molding (cleanest) or plastic edge strip (cheapest)
- Cut trim to length with a hacksaw or utility knife; bed it in short dabs of the same mastic, not a continuous line — air has to keep moving behind the glass
Every gap stays open — no caulk on this system:
- Nothing gets filled. Not the joints, not the perimeter, not the bottom edge. The gaps are the wall's drainage and its airway, and both jobs end the moment they're caulked
- Splash that finds an open joint drains down behind the glass and dries through the flues. Caulk the bottom and you've built a dam that holds that water against the backing instead
- The open top edge is the exhaust, the joints are the intakes — none of it is an unfinished edge
- Found caulk on an older wall? Cut it out and leave the gap open — see Troubleshooting for the black creep it causes
Final inspection and polish:
- After full cure (24–48 h), press each tile gently — it should not flex, rock, or click. A tile that gives isn't gripped by all its beads: lift and re-set it now, not after it falls
- Don't tap-test for "hollow" spots — that's floor-tile advice. A bead-hung mirror tile is mostly hollow behind by design; hollow is normal, movement is the failure
- Shave stubborn adhesive residue with a razor blade held nearly flat against the glass
- Polish with ammonia-free glass cleaner — spray the cloth, not the wall, so cleaner never wicks into the joints
- Store the spare tiles flat, cardboard between them, labeled with the lot number
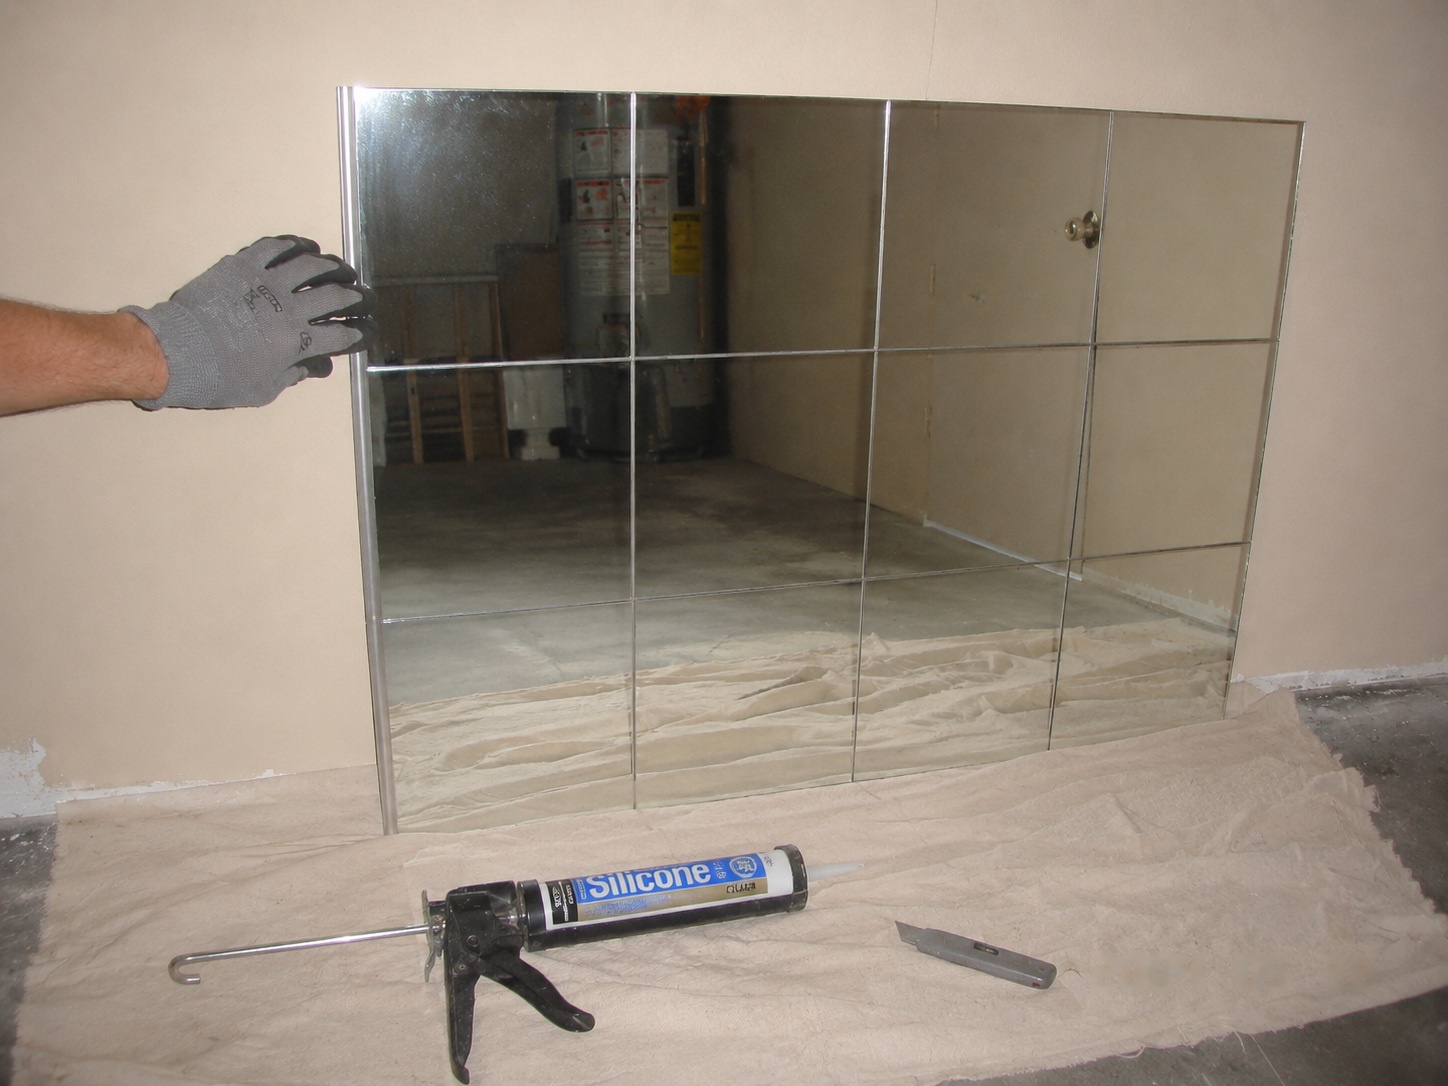
J-molding pressed over the raw outer edges — and every gap left open. The silicone in the shot stays in its tube on this system.
💡 Pro Tips
- Two people make every part of this easier — one sets, one checks level and feeds tiles
- Number the back of cut tiles with a marker as you cut them — cut pieces look identical leaning against a wall
- Keep the room 60–80°F from first bead to full cure
- Clean as you go — cured mastic takes mineral spirits and patience; fresh mastic takes one wipe
- Covering an access panel? Set those tiles on a thin plywood backer screwed to the panel, not glued to the wall, so it still opens
- Photograph your receipt and the tile lot number — future-you repairing a corner will be grateful
- Mirror walls die from trapped moisture, not from too little caulk — when in doubt, leave it open
Mirror Tile Applications and Design Ideas
- Accent walls — one full wall in a dining room or entryway doubles the perceived space
- Backsplash look — a two-row band above a counter or vanity; the gaps stay open here too — they're the drainage
- Closet and wardrobe doors — solid, flat panels only: a hollow-core door flexes and slams, and flexing sheds glued glass. Contain the field with trim that's screwed on, not just glued
- Home gym — the budget version of a commercial mirror wall, but keep it clear of anywhere a bar or weight can strike: glued mirror tile is not safety glass
- Small dark rooms — a tiled section opposite the window borrows its light
- Design twist: border the field with antiqued or smoked tiles for a framed look without a frame
Advanced Cutting
L-cuts (around outlets and switches)
- Score both legs of the L, then nibble the waste out with running pliers, working toward the corner
- Cut power at the breaker and remove cover plates before tiling around any outlet
- Keep glass edges 1/8" back from the electrical box; the cover plate hides the gap
Holes
- Use a carbide or diamond hole saw at low speed with a water drip — dry drilling cracks mirror
- Back the exit side with tape to reduce chip-out
When to rent a wet saw
- More than a dozen cuts, any tile thicker than 1/4", or any diagonal layout
- A wet saw turns edge-tile day from nerve-racking to boring — boring is good
Polishing cut edges
- 220-grit wet, then 400-grit wet for edges that will sit under trim anyway; stop there — optical polish isn't worth the hours
Maintenance and Long-Term Care
- Clean with ammonia-free glass cleaner only — ammonia attacks the silver backing at the joints
- Always spray the cloth, never the wall; liquid wicking into joints is the #1 killer of tiled mirror walls
- Humid rooms: glance along the bottom row once a year and make sure the open gaps are clear — dust and soap scum that bridge a gap block its draining and drying
- The open gaps are not a defect — they're the airway and the drainage. Don't let anyone "finish the job" with a caulk gun later
- Black spots creeping in from a tile's edge mean moisture or adhesive is reaching the backing — find the source before replacing the tile
- Replacing one tile: tape off the neighboring tiles' edges, slip a length of steel wire behind the tile through the open joints, and saw through the beads — the open joints and hollow back are what make this possible. No heat guns on glass (thermal shock cracks mirror). Scrape the wall flat, re-prime the spot if it tore, and set the spare with fresh beads
Troubleshooting Common Issues
A tile won't stick / fell off
- Wall was dusty, greasy, glossy, or damp — re-prep the spot and re-set with fresh mastic
- Porous wall never got primer — bare plaster, concrete, and wood drink the adhesive; prime with Xtraprime, wait an hour, re-set
- The mastic had skinned before the tile went up — bead one tile at a time and hang it immediately
Joint gaps uneven or wandering
- No feeler was used — set a 1/16" spacer or two playing cards against the last tile as you place each new one; lift and re-set the offenders within the first hour
- Rows drifting off the reference lines — check with the level every 3–4 tiles, not every 10
Edges chipping at the joints months later
- Tiles were set glass-to-glass with no gap — the wall moved and ground them together. Replace the chipped tiles from your spares, with 1/16" gaps this time
Reflection looks wavy or distorted
- The wall isn't flat — mirror shows every bump paint hides. Check with a straightedge; skim-coat hollows before tiling
- Tiles pressed to different depths — on beads, how hard you press sets how close the tile sits. Press each tile until it's flush with its neighbors, checking with a straightedge across the faces while the mastic is still fresh
Black spots at tile edges
- Wrong adhesive, or trapped vapor corroding the silver backing — verify it was the Xtragrip MS Polymer (not construction adhesive) and that every gap and edge is open so vapor can leave
- Black creep starting exactly at a caulked edge — someone filled a gap (and if it was acid-cure silicone, the acid makes it worse). Cut all of it out, let the edge air out, and leave the gap open — on this system gaps are never filled
Mastic still soft days or weeks later
- The field was caulked shut before cure, or has no open edge — MS Polymer cures on air moisture and can't harden in a sealed cavity. Cut every bit of caulk out, give it air, and re-check in a few days
Cut edges chipping
- Multiple scoring passes or a dry wheel — oil the cutter, score once, and snap promptly after scoring